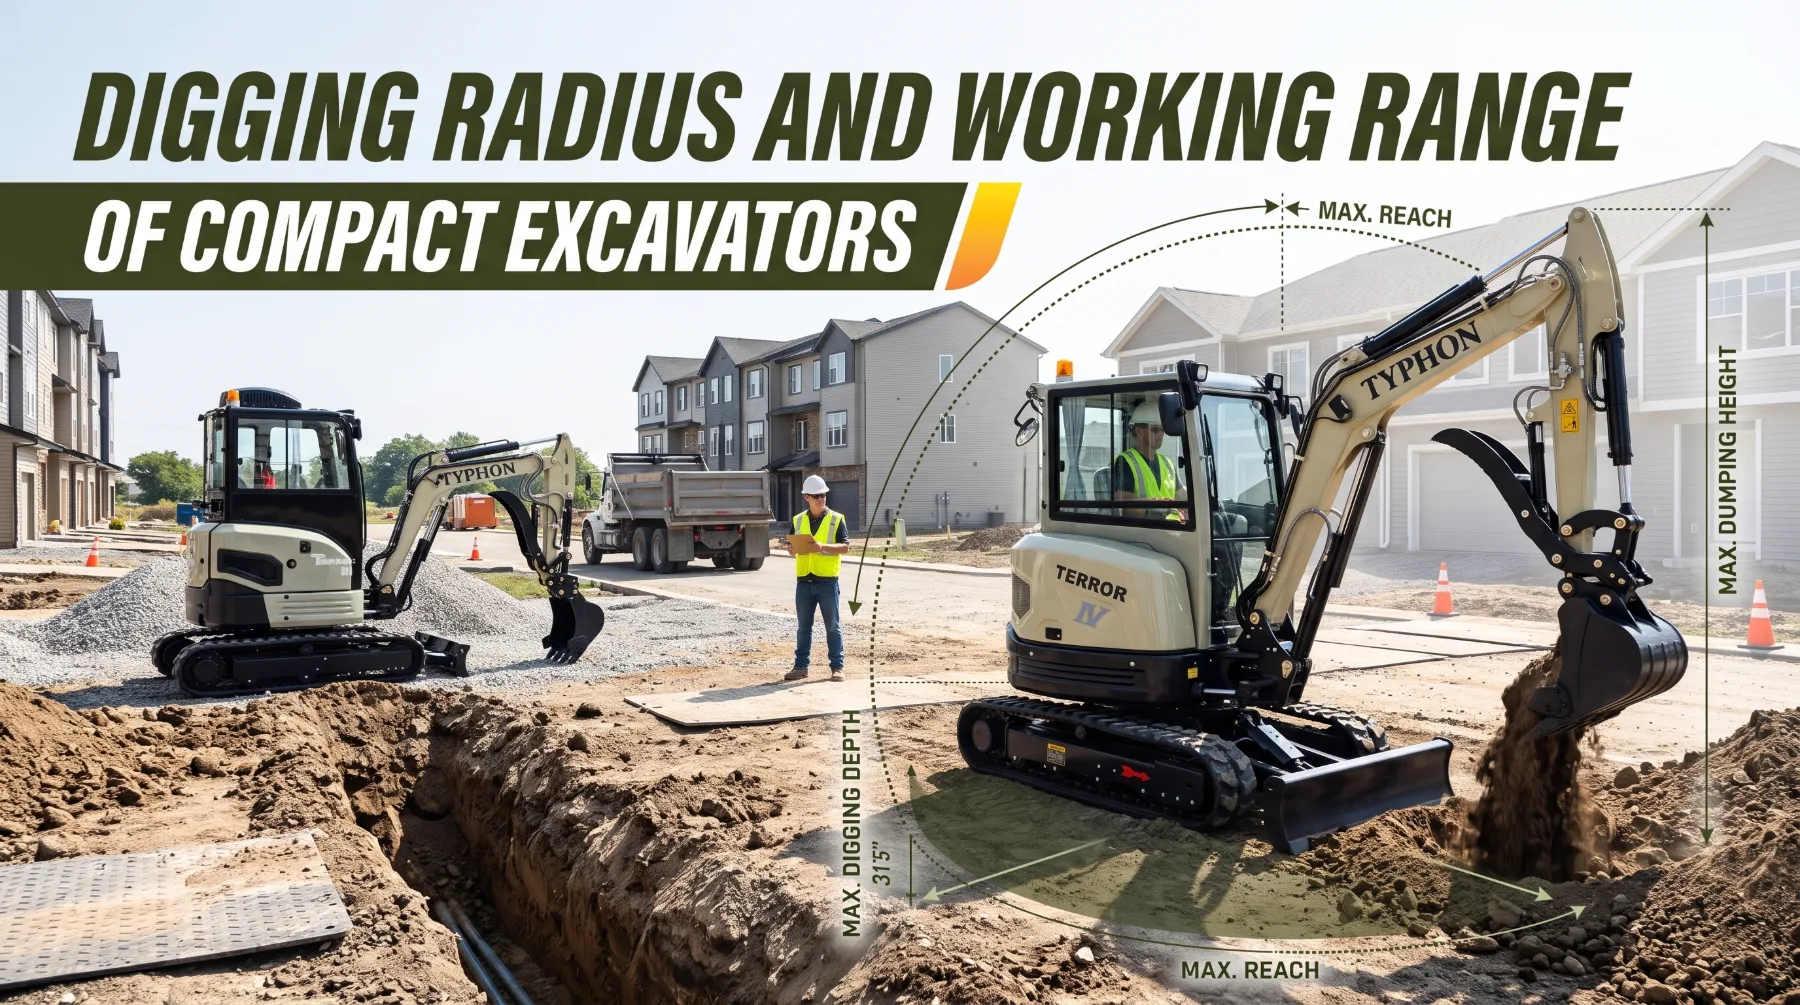
A utility contractor wins a job to replace a sewer lateral behind a row of townhomes. The trench needs to reach about 6 feet deep, and spoil must go straight into a dump truck parked on the street side of a low retaining wall. The crew brings a compact excavator whose brochure lists a depth figure that clears the requirement. On site, the problems appear one after another. The machine reaches grade, but only with the arm fully extended. At that depth, each bucket pass is slow and only partly full. When the operator swings to load, the bucket barely clears the truck's side boards. Because the reach is short, the tracks have to sit closer to the trench edge than the superintendent wants. The machine was not wrong for the job because of one number. It was wrong because no one had checked the full working range.
A compact excavator's working range decides how well it can dig, load material, and reach different areas without constant repositioning. Digging radius is one important measurement, but it is only part of the picture. Digging depth, reach at ground level, digging height, unloading height, and swing capability all shape what the machine can do from one setup position. Each of these depends on how the boom, arm, and bucket are designed and how the machine is positioned on the ground.
When you understand these specifications and read them together, you can match the machine to the work before it reaches the site. That protects your schedule, your crew, and the ground around the excavation.
Digging Depth and Ground-Level Reach
Maximum digging depth shows how far below ground level the bucket can excavate under specified conditions, typically measured from the ground line to the bucket teeth tip with the boom lowered and the arm positioned for maximum depth. That maximum describes the very bottom of the working envelope. At that point, the arm is often fully extended, so breakout force, cycle speed, and bucket fill can all be lower than at normal working depths. Operators may also lose some usable depth to bucket shape, soft or sloping ground under the tracks, the setback needed from the excavation edge, and space required for bedding, pipe, or footing forms. Plan for a sensible margin rather than expecting the machine to work at its absolute limit throughout the shift.
Some specifications also list vertical wall digging depth, which describes how deep the machine can dig while keeping a near-vertical trench wall. It is usually less than maximum digging depth because the bucket must stay closer to vertical. If your projects need straight trench walls, such as for footings or some utility runs, this figure is often more useful than the maximum depth figure alone.
Ground-level reach describes how far the bucket can extend horizontally at the ground line, and it differs from maximum digging radius because the boom and arm cannot always reach as far at ground level as they can at their best extension angle. Ground-level reach determines how far from the trench edge the machine can sit and still dig, how far spoil can be placed from the excavation, how well the machine can grade or backfill from one position, and how easily the operator can reach across a trench or obstacle. Compare all three figures, maximum digging depth, vertical wall depth, and ground-level reach, against your typical trench and footing dimensions, and leave a working margin.
Key takeaway: Maximum digging depth sets the bottom of the envelope, vertical wall depth reflects straight-walled excavation, and ground-level reach controls setback and spoil placement. Compare all three with your typical trench and footing dimensions, and leave a working margin.
Machine Positioning and Stability
A published working range assumes the machine sits on firm, level ground. On a real site, the usable range depends on ground conditions, machine orientation, and how close the tracks can safely get to the excavation. Reaching for the edge of the envelope while positioned poorly creates stability and cave-in hazards. Apply these five practices on every excavation.
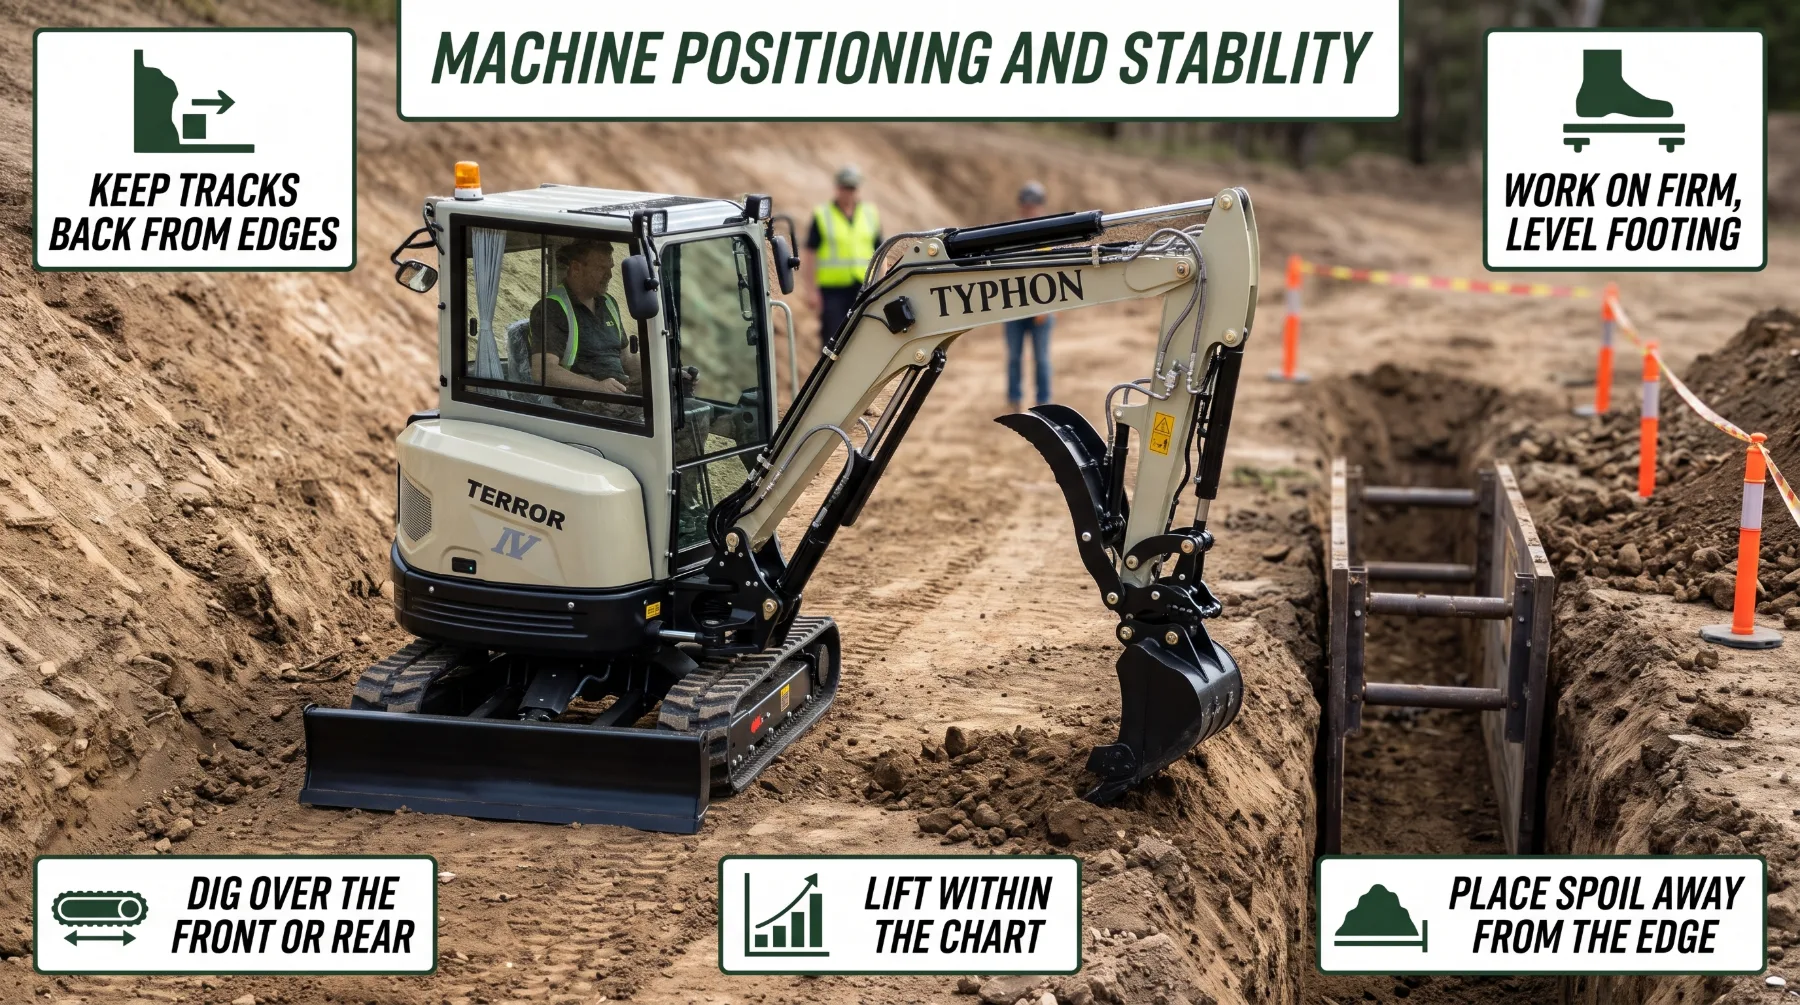
- Edge Setback: Keep tracks back from trench and excavation edges as the site plan and a competent person direct, especially in loose, wet, or previously disturbed soil.
- Firm, Level Footing: Position the machine on stable ground, and build a level working pad where the site slopes.
- Correct Orientation: Dig over the front or rear of the tracks where possible, rather than over the side, and follow manufacturer guidance on dozer blade position.
- Spoil Placement: Keep spoil piles back from the excavation edge as required, so they don't add load to the trench wall or roll back in.
- Lift Within the Chart: Check the lift chart at the actual working radius before lifting, and never extend reach to lift a load beyond its rated capacity.
The weight of an excavator near a trench edge adds load to the trench wall. Combined with vibration and soil conditions, that load can cause the edge to collapse under the tracks or into the trench. Follow the site's excavation plan and applicable requirements for protective systems, such as sloping, benching, or shoring, wherever workers may enter the trench. A machine with enough ground-level reach lets the operator maintain a safer setback while still reaching the work.
Excavators are generally most stable when digging over the front or rear of the tracks. Digging or lifting over the side offers less stability, especially on retractable undercarriages set to a narrow width. Expand variable-width undercarriages to their full working width wherever the site allows, and lower the dozer blade to the ground when the manufacturer's instructions support doing so. On slopes, cut a level pad before digging where possible, avoid swinging a loaded bucket toward the downhill side, and travel straight up or down slopes rather than across them. Overreaching to avoid repositioning is one of the most common habits that reduces safety and productivity. Plan machine setups so the operator works within the comfortable middle of the working range most of the time.
Key takeaway: The usable working range depends on firm footing, safe setback from edges, correct track orientation, careful spoil placement, and lifting within the chart. Plan setups that keep the machine stable instead of overreaching to the edge of the envelope.
Maximum Digging Height and Unloading Height
Maximum digging height shows how high the bucket teeth can reach during excavation movements, with the boom fully raised and the arm extended. It matters when cutting into banks, trimming slopes, removing material from a raised area, or working near overhead obstructions. It also serves as a warning figure. Before work begins, compare it with overhead power lines, tree canopies, eaves, and building structures. The machine's full reach upward can bring it closer to hazards than the operator expects. Always maintain the clearance from power lines required by local regulations and the utility owner.
Unloading height, also called dump height, describes how high the bucket can be raised while still able to discharge material. This figure determines whether the excavator can load dump trucks, tandem-axle trucks, dump trailers, tracked or wheeled dumpers, roll-off containers, and raised stockpiles. For truck loading, the bucket must clear the sideboards with enough room to dump cleanly. Compare the unloading height with the side height of the trucks you use most often, then allow a practical clearance margin. Also consider the ground. If the truck is parked on higher ground than the excavator, the effective unloading height decreases. A common mistake is checking only whether the dump height is greater than the truck side height. The better approach is to confirm that the bucket clears the side with room to spare at the reach needed to position it over the center of the bed, since unloading height often decreases as the bucket moves farther from the machine.
Key takeaway: Maximum digging height defines upward reach and the clearance needed around overhead hazards. Unloading height decides whether the excavator can load your trucks and containers efficiently, so compare it with your actual vehicles and leave a practical clearance margin.
Boom, Arm, and Bucket Geometry
Every working-range figure comes from the machine's linkage geometry. The boom is the main lifting member connected to the upper structure. Its length and shape set the basic proportions of the working envelope. Many compact excavators also offer boom swing, which lets the boom pivot left or right independently of the upper structure, making it possible to dig parallel to walls, fences, and foundations without repositioning the whole machine. Check the boom swing angles for each model, since they affect how close the machine can dig beside obstacles.
Arm length has a direct effect on reach and depth. A standard arm delivers higher digging force, faster cycle times, and stronger lift capacity close to the machine, while a long arm provides greater digging depth, reach, and sometimes dump height in exchange for some arm digging force and lift capacity at radius. Choose the arm that matches your typical work. A long arm helps when deep trenches or long reach are routine, while a standard arm usually suits general excavation and dense soils where breakout force matters more than extra reach.
The bucket completes the linkage. Bucket width, depth, and shape affect how much material each pass moves and how cleanly the machine finishes trench walls and bottoms. A larger bucket adds weight at the end of the arm, which can reduce lift capacity and change balance. Use only buckets approved for the specific model, and check their weight against the machine's ratings. Two excavators with similar operating weights can still have very different reach and digging characteristics depending on boom length, arm length, pivot positions, and cylinder placement. Compare the complete working-range diagrams rather than assuming machines in the same weight class perform the same way. Also note that digging force and lift capacity are not constant across the working range. The lift chart shows rated loads at different radii and heights, and if your work includes lifting pipe, boxes, or materials, check the chart at the radius you will actually use.
Key takeaway: Boom design, arm length, and bucket choice decide the shape and strength of the working envelope. Compare standard and long-arm options, use boom swing for work beside obstacles, and review both the working-range diagram and the lift chart, because machines of similar weight can perform very differently.
Understanding Digging Radius
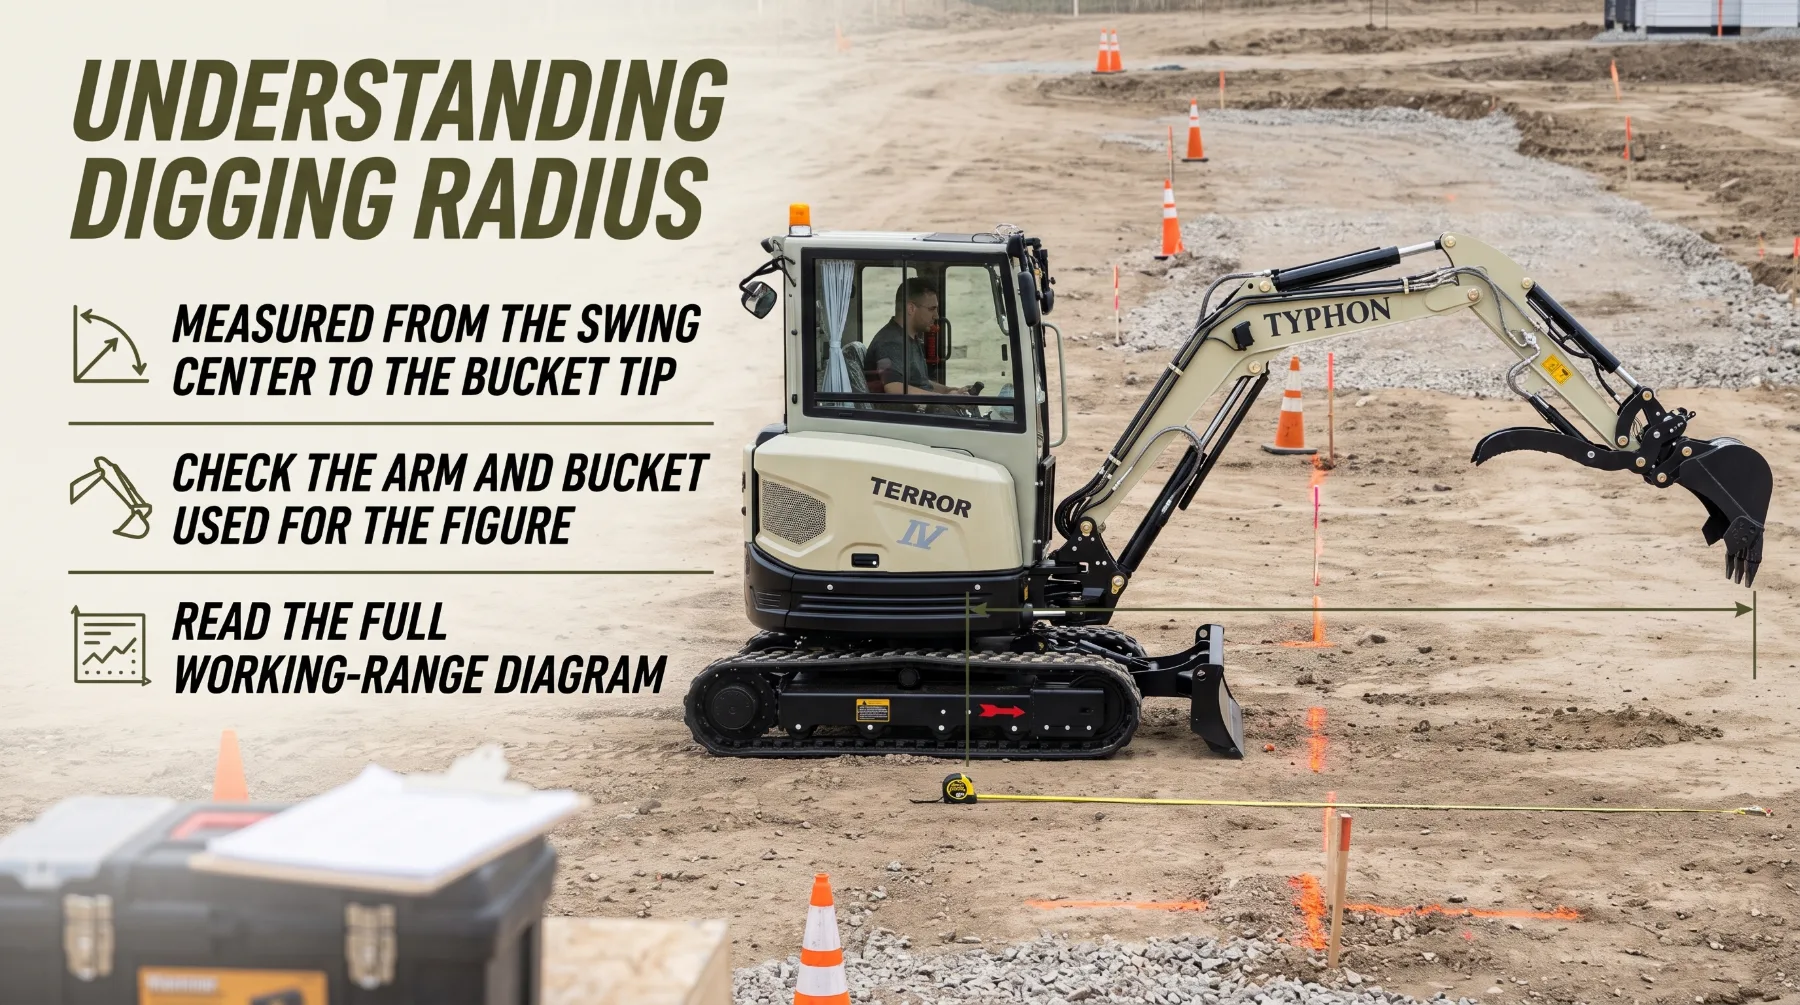
Digging radius, often listed as maximum digging reach, describes the horizontal distance the bucket can reach from a defined reference point. That reference point is usually the machine's center of rotation, also called the swing center. The measurement is typically taken to the tip of the bucket teeth with the boom and arm extended to their farthest horizontal position. Because the measurement starts at the swing center, the figure includes the distance from that center to the front of the machine. The bucket does not reach that full distance beyond the tracks, which is why a machine with an impressive radius figure can still feel short when the operator needs to reach across a trench from a safe setback.
The exact measurement method can vary by manufacturer. Some published figures are based on a standard arm and bucket, while others list results for optional long arms. Some measure to the bucket teeth tip, while others use different points on the linkage. For a fair comparison, confirm the reference point used, the arm length and bucket included, whether the figure describes reach at maximum extension or at ground level, and whether optional equipment such as a long arm changes the result.
Every reputable manufacturer publishes a working-range diagram for each model. The diagram shows the outline of the area the bucket tip can reach as the boom and arm move through their full range, including how reach changes with height and depth. Read the diagram instead of relying on a single maximum figure. Two related measurements also affect tight-space work: minimum front swing radius, which is the smallest circle the front attachment covers when the arm is curled in, and tail swing radius, which describes how far the rear of the upper structure extends during rotation. Zero-tail-swing and reduced-tail-swing designs keep the counterweight close to the track footprint, helping in confined areas.
Key takeaway: Digging radius measures horizontal reach from a defined reference point, usually the swing center, under specified conditions. Confirm how each manufacturer measures it, check the arm and bucket used for the figure, and use the working-range diagram rather than a single maximum number.
Selecting a Machine for the Project
Before looking at specifications, define what the excavation requires: maximum trench or footing depth including bedding and over-dig, trench width and the bucket width it needs, the distance the machine must reach from a safe setback, spoil placement distance and height, truck or container side heights for loading, overhead clearances and nearby structures, and access width and space available for repositioning. These figures become the benchmark for every machine you compare.
For utility and water-line trenching, the most important specifications are maximum digging depth and ground-level reach, with additional checks for bucket width, boom swing, and edge setback. Foundation and footing excavation calls for close attention to vertical wall digging depth and overall digging depth, along with bucket shape and spoil placement. Drainage and landscaping work depends most on ground-level reach and boom swing, with ground pressure, tail swing, and access width as supporting checks. Truck and container loading hinges on unloading height and reach at dump height, so also confirm truck side height and any ground level difference between the machine and the vehicle. Bank cutting and slope work requires maximum digging height and reach, with overhead hazards and slope limits as key additional considerations. Lifting pipe or materials means checking the lift chart at the actual working radius, along with attachment weight, blade position, and ground conditions.
Collect the working-range diagram, lift chart, and dimension sheet for each model you are considering. Compare digging radius and ground-level reach, maximum digging depth and vertical wall depth, maximum digging height and unloading height, arm options, boom swing angles, tail swing radius, operating weight, and transport dimensions. Overlay your job dimensions on the diagrams. A machine that meets your needs within the middle of its working range will work faster and more safely than one that only reaches them at full extension. A larger machine usually offers more depth, reach, and unloading height, but may not fit through gates or onto your trailer. Balance working range against access width, ground pressure, and your trailer and tow vehicle ratings. Where possible, test the excavator on ground similar to your sites with the bucket you plan to use, dig to your typical depth, load a representative truck, and check how comfortably the operator can reach the work from a safe setback.
Key takeaway: Define your depth, reach, height, and access requirements first, compare them with each model's complete working-range diagram, lift chart, and dimensions, and choose a machine that meets the job within its comfortable working envelope, confirmed through a demonstration.
Conclusion
A compact excavator’s working range involves more than its maximum digging radius. Radius measures horizontal reach from a defined reference point, while ground-level reach determines how far the machine can work at ground level for tasks such as trenching and spoil placement. Maximum digging depth and vertical wall depth affect whether the machine can reach the required grade, while digging height and unloading height determine its suitability for bank work and truck loading. These measurements are shaped by boom, arm, and bucket geometry, which defines the machine’s working envelope and performance at different positions. Actual reach also depends on machine positioning, ground conditions, and safe clearance from excavation edges. Daily maintenance helps preserve digging performance and operating reliability. Before starting work, operators should inspect hydraulic hoses, fluid levels, tracks, bucket teeth, pins, and connections for leaks, wear, or damage. Buyers and rental customers should identify their typical digging depths, reach requirements, unloading heights, and site access widths before comparing models. Requesting working-range diagrams, lift charts, and dimension sheets helps verify each machine’s capabilities, while comparing arm configurations reveals differences in reach and digging performance. Site layouts should also account for safe edge setbacks and spoil placement, and transport plans must meet trailer and tow vehicle ratings. A demonstration on representative ground provides a practical way to confirm that the excavator can handle the required tasks safely and efficiently.
Frequently Asked Questions
What does digging radius mean?
Digging radius describes the horizontal distance the excavator bucket can reach from a specified reference point, usually the swing center, under defined conditions. It is typically measured to the bucket teeth tip at full extension with the standard arm and bucket. Check the manufacturer's measurement method before comparing models.
Is digging radius the same as digging depth?
No. Digging radius measures horizontal reach, while digging depth measures how far below ground level the bucket can excavate. Both appear on the working-range diagram along with ground-level reach, digging height, and unloading height. Review them together to understand what the machine can do from one position.
Why is unloading height important?
Unloading height decides whether the excavator can discharge material into a truck, trailer, dumper, or container. The bucket must clear the vehicle's sides with a practical margin at the reach needed to position over the center of the bed. Ground level differences between the excavator and the truck can also reduce effective unloading height.
Where can buyers find working-range specifications?
Check the manufacturer's specification sheet and working-range diagram for the exact model and arm configuration. The lift chart shows rated loads at different radii and heights, and the dimension sheet lists operating weight, width, and tail swing. Your dealer can supply these documents and arrange a demonstration.